Showing posts with label Biscuit baking. Show all posts

Thursday, 30 October 2014

Oh la la, its a French Macaron!!! Workshop at Angel Food Bakery

Just over a week ago, I spent a lovely day in Brighton with my friend Sophia.  As well as a good excuse for a spot of shopping and a nice lunch at Vietnamese Restaurant 'Pho', our main reason for visiting was to attend a workshop at Angel Food Bakery on How to make French Macaron. 


Now Sophia is a bit of a dab hand at these already, but was keen to pick up any tips.  I've tried them twice.  Beginners luck gave me some passable Lemon Macaron.  My second attempt........ well they were welded to the baking parchment.

It seems these little blighters are a bit pesky and very sensitive.  Preparation is key.  I have listed some of the top tips below to help towards a superior Macaron.  

We had a go at two types of Macaron.  The first was a plain shell, which had colour added at the end of the meringue whisking.  A simple butter cream was used as the filling and could have flavourings added.  Not surprisingly, I chose to make purple Macaron.


Sophia got a bit enthusiastic with the pink food colouring.


There were 5 of us on the workshop and as you can see the colours are all pretty different!


Once cooked and cooled, we then got to choose our flavour for the butter cream filling.  As mine were purple, I went for Violet and added just 5 drops of Violet flavouring to my butter cream.  I didn't colour the butter cream as I wanted the contrast between purple and cream.  They were lovely and delicate in flavour.


We also had a go at Chocolate Macarons which has cocoa powder added to meringue mixture and were filled with a chocolate ganache.  I opted to have half fill mine with dark chocolate ganache and then added some orange flavouring to the remaining ganache for a dark chocolate orange filling.  Delicious.  The chocolate Macaron are a little harder in texture, but still have an amazing flavour.


They make a very decadent afternoon treat.


Or equally lovely to give away as gifts.


At £45 for a 3.5 hour workshop, its well worth the money and you come away with a box full of tasty treats.


Top tips for a superior French Macaron.
  • Crack your eggs at least a few hours before attempting Macaron.  Ideally leave the egg whites to sit overnight.  It helps loose some of their elasticity and makes a stiffer meringue.
  • The ground almonds mustn't be too damp as you need to sift them first, but don't force any bits through your sieve, else you release too much oil and alter the crucial ingredient ratio.  You may have to throw some large bits away, or save them for a cake that isn't so fussy!
  • Sieve the already sieved ground almonds with your icing sugar and then grind together in a Magimix for about 10 seconds.
  • Food colouring powders are better for Macaron than liquid colouring as they don't affect the mixture ratio, but if you cant get them use colour pastes like Sugarflair.  They give really intense colours. 
  • When you pipe the meringue onto your baking sheet, you are sometimes left with little peaks.  To flatten out wet your index finger, shake off any excess water and gently tap the peak down.
  • The proper whisking of the meringue is crucial.  There is a fine line between under and over whisking.  It needs to be whisked for at least 5-6 minutes until it resembles shaving foam and little bits start flicking off the whisk. This is when you add your colouring, then quickly turn off before it gets over whisked.
  • If you can bare it, leave the filled Macaron in the fridge, loosely covered, to mature for at least 24 hours.  This helps the flavours meld into the shells and gives them their distinctive chewiness.
  • Filled Macaron can be frozen!
I learnt so much more in this workshop and its an absolute bargain at the price.  I hope to attempt some more Macaron at home this weekend now I feel more confident, playing around with new colours and flavours.  Then back to Brighton in a couple of weeks for a Cupcake Baking and Decorating Workshop!

Angel Food Bakery is a gem of a find.

Happy Baking!


Friday, 29 August 2014

Great British Bake Off - Florentines - Mary Berry Recipe

Well, the temperatures are heating up in the Great British Bake Off tent, but today's offering is Mary Berry's Florentines from Week 2 - Biscuits.  Here, they formed the Technical Challenge for the bakers, but it seemed the most important thing to know was how to temper chocolate.  That and correctly measuring out your ingredients.

Firstly, prepare and weigh out the nuts, flour and fruit.  I had some flaked almonds to use up, so used these instead of chopped almonds.  I chopped them into smaller pieces so the mixture would adhere together.  As I didn't have the amount of almonds required, I just used extra hazelnuts.  It is, however, just as I am typing this up, that I realise the recipe called for walnuts, NOT hazelnuts.  Ooopps.  Oh well, still tasted great.


Gently heat the butter, golden syrup and demerara sugar until the butter has melted.  The sugar does not need to dissolve.


Add the flour, fruit and nuts and combine.


You then need to divide the mixture into 18 portions and place 6 on each lined baking tray.  I have quite large baking trays, so will just use 2 next time.  The important thing is they need space to spread.


Pop into a preheated 180c static oven and bake for 8 - 10 minutes.  Mine took 8 minutes on the top shelf and 9 minutes on the bottom.  They need to be golden brown.  Just cooked enough, so they have a crunch as you bite in, but a chewy centre, but not undercooked, so they flop when picked up once cooled.


I don't think I would have won any prizes for equal sizing, but hey, I can work on that!  Whilst they were cooling on a wire rack, it was time for the chocolate layer.  The recipe is also found in Mary's Baking Bible, and here she suggests melting all the chocolate together, then spreading over the base of the Florentine and allowing to cool.  On Bake Off, the chocolate needs to be tempered, so half the chocolate is melted in a bowl over a pan of simmering water until it reaches 53C.  The remaining chopped up chocolate is then added to the bowl (now removed from the simmering water) and stirred until it melts and then cools to 26C.  For this you really need a proper sugar thermometer (now on my shopping list!!) as mine only went down to 50C.  So basically I judged it by whether I could make a zigzag in the chocolate once on the biscuit.


 Simply delicious served with a proper posh tea, in a not so posh but lovely mug!


I shared a few, but most got nibbled straight from the tin as they were so moreish.

I've also been making the most of the late summer fruit harvest. 
Damson Gin, which will mature until Xmas ......... hopefully!


Plus Cinnamon Baked Plums which I found on a great website - The British Larder.
Perfect with yoghurt, rice pudding, ice-cream.


Happy Baking!

Sunday, 27 April 2014

Jo Wheatley's Chocolate Orange Cookie Sandwiches

 
So there I was looking through the recipes I had saved in my favourites on the computer and thinking I really must make one of them.  I found a Jo Wheatley cake recipe and promptly got side-tracked by her Chocolate Orange Cookie Sandwich recipe that was linked to it.  My Dad is rather partial to a Terry's Chocolate Orange, so how could I resist trying them.

First you make the filling by heating up some double cream (I only made half the amount for the filling).  My Sis got me this brilliant little pan in Germany with the measurements on the inside.  Perfect for the job.


The heated cream is added to the chopped up chocolate.


I used 70% cooking chocolate from Lindt which melted down perfectly.  Stir in the grated orange zest and chill until set.


Then you set about making the cookie dough.


Once everything is mixed together, I used my cookie scoop (great present from my Mum!) to make relatively even sized dough balls.


In total I got 40 dough balls from the recipe amount.  26 were baked in 2 batches in a 170c fan oven for 12 minutes per tray until golden brown.


The rest I have frozen for another day.  Jo recommends taking the frozen dough balls out of the freezer and allow to thaw a little whilst you pre-heat the oven.  They should then bake in 15 minutes.
(ETA:  I did as above, but the cookies were a little over-done.  Still scrummy, but perhaps best to check at 13 or 14 minutes).

Take your filling out of the fridge and sandwich 2 cookies together.  They are whoppers, but very tasty!  I used dark chocolate for this batch, but for a more child-friendly version try using milk chocolate instead.


The gorgeous tulips were a gift from a lovely lady I know who got them from Tuppenny Barn Organics.  We are trying to find out the variety, as I'd love to grow some.  4 days old and they are still as fresh as the day they were picked.

Happy Baking!


Tuesday, 13 August 2013

A couple of handy tips

Erratic Internet connection make me a bad blogger of late, but I'd just thought I'd fill you in on a couple of handy tips I picked up a couple of weekends back.

I was making a bit of Afternoon Tea for my running buddy and her daughter, which we enjoyed in the garden on another scorching hot day.  This time I cheated slightly and used some of the scones I had made for this spread from Mary Berry's Baking Bible. 


The recipe made about 25 scones, so I had frozen a load.  As suggested by my Mum, I took the required amount out of the freezer and left them to defrost.  Just before they were required, I popped about 8 on a plate and pinged them in the microwave on high for 20 seconds.  They were perfectly refreshed and delicious with clotted cream and homemade blackcurrant & gooseberry jam.

I also made another batch of Mary's Lavender Biscuits.  I baked up half the amount of biscuit dough and put the other half in the freezer (wrapped in baking parchment and then in a freezer bag )for another tea party, all ready to slice and bake.  I plan to try the biscuit recipe with some freeze-dried raspberries instead of the lavender, but more on that another time.


Some lemon cupcakes from the Hummingbird Bakery Cookbook and a lemon & poppy seed cake from The Bodyfoods Cookbook topped it all off with a nice cuppa tea!

According to the Hummingbird blog, cupcakes with fruit, fruit puree or juice in them never rise as much as those that don't.  A handy tip to know.  All the more excuse to put added frosting on top.

Happy baking!

Sunday, 21 July 2013

A Spot of Cream Tea and a Few Extras

So what do you do to mark the arrival of the hottest summer in seven years........ have some Afternoon Tea of course.  A tad hot in the garden, but as most of it was flower or fruit based, sitting outside it had to be!

I made some cute little bite-sized jam tarts filled with either lime curd or blackcurrant jam from a recipe I wrote out years ago. 


Then I turned to the Queen of Cakes and consulted Mary Berry's 'Baking Bible'.   First up were some Lavender Biscuits made from some freshly harvested fragrant flowers.  A simple biscuit to make and the aroma was divine.  Eat within a couple of days if you want them crisp.  Still tasty later, but they become softer.

Next up, I had a go at one of my 'Never Tried Before' bakes - Scones!  I know, so simple (but so much can go wrong!!).  Mary walked me through it with lots of helpful tips...... keep the dough sticky - it will achieve a better rise, do not twist the cutter when you are cutting out - twisting could cause an uneven rise, dip the cutter in flour regularly whilst cutting out - stops the cutter sticking to the dough.


I was surprised by the texture of the dough, sticky and quite holey, but the rise was good and consistent.  I only made small scones, as it was for an afternoon tea.  Served with Cornish Clotted Cream and a Strawberry Compote I made from Strawbs from our allotment.  Wash the strawberries and pop in a pan with some vanilla sugar.  Cover and reduce slowly over a low heat.  No need for extra water in the pan - they should be juicy enough.  Delicious.


Finally I made one of my old fav's for this time of year.  The onset of courgette glut signals copious amounts of Jamie Oliver's Courgette Carbonara in our house.  But for the first of the courgette harvest, I just had to make Nigella's Courgette Cake.  It comes from Nigella's 'How To Be a Domestic Goddess' Book.  Other than my Winnie The Pooh Cookbook (which has my go-to flapjack recipe in it), Nigella must have been my first ever baking book.  I've been baking her courgette cake ever since we got an allotment.  Never before, have I bothered with the icing, as we are always in too much of a rush to eat it - filled with lime curd, its moist and utterly divine.  But for this special tea, I thought I'd give the topping a go.  It was delicious, with a limey zing.


I confess, I never usually bother with the raisins and just add extra courgettes.  Its a winner every time, so give it a go, you won't be disappointed.  Summer is here!

Happy Baking!


Wednesday, 5 June 2013

Vanilla Sugar Cookies - The Pink Whisk

Boy am I starting to get a collection of baking utensils and decorating tools.  A new sideboard in our kitchen has been filled with just pretty much these things.  Perhaps my new baking challenge should be to use each item??  But no!  I've decided to compile a list of all the baked items I've never tried making before and give them a go.  Get me out of my comfort zone a bit.

So far we've got:-
Decorated biscuits - a simple start
Scones
Bagels
Crumpets
Meringues
Homemade puff pastry

That's without even consulting the library of baking books, so I'm sure the list will increase.  Any suggestions gratefully received.

I thought I'd have a play with some of my decorating tools and chose the Vanilla Sugar Cookies from The Pink Whisks 'The Busy Girls Guide to Cake Decorating' as a base biscuit.  The recipe makes a lot of dough, so I used half and put half in the freezer.  Wrapped in clingfilm, it can last up to 3 months.


The dough is rolled out between 2 sheets of greaseproof paper and then chilled for 30 minutes before cutting out the shapes.


Then chill again for 15 minutes.  This helps the biscuits hold their shape in the oven.  I baked in a 180C static oven with 8 minutes for smaller cookies and 9 minutes for larger cookies.

Re-chill the dough between each rolling out as the dough softens fast and the shapes don't hold firm when cutting them out.


The online recipe does suggest vanilla paste, but the book gives 5ml of vanilla extract as an alternative.  That's what I went with.

Now the first batch never even made it to the decorating stage - I warn you they are a bit moorish!  The second half of the dough was whipped out the freezer and baked the next day.

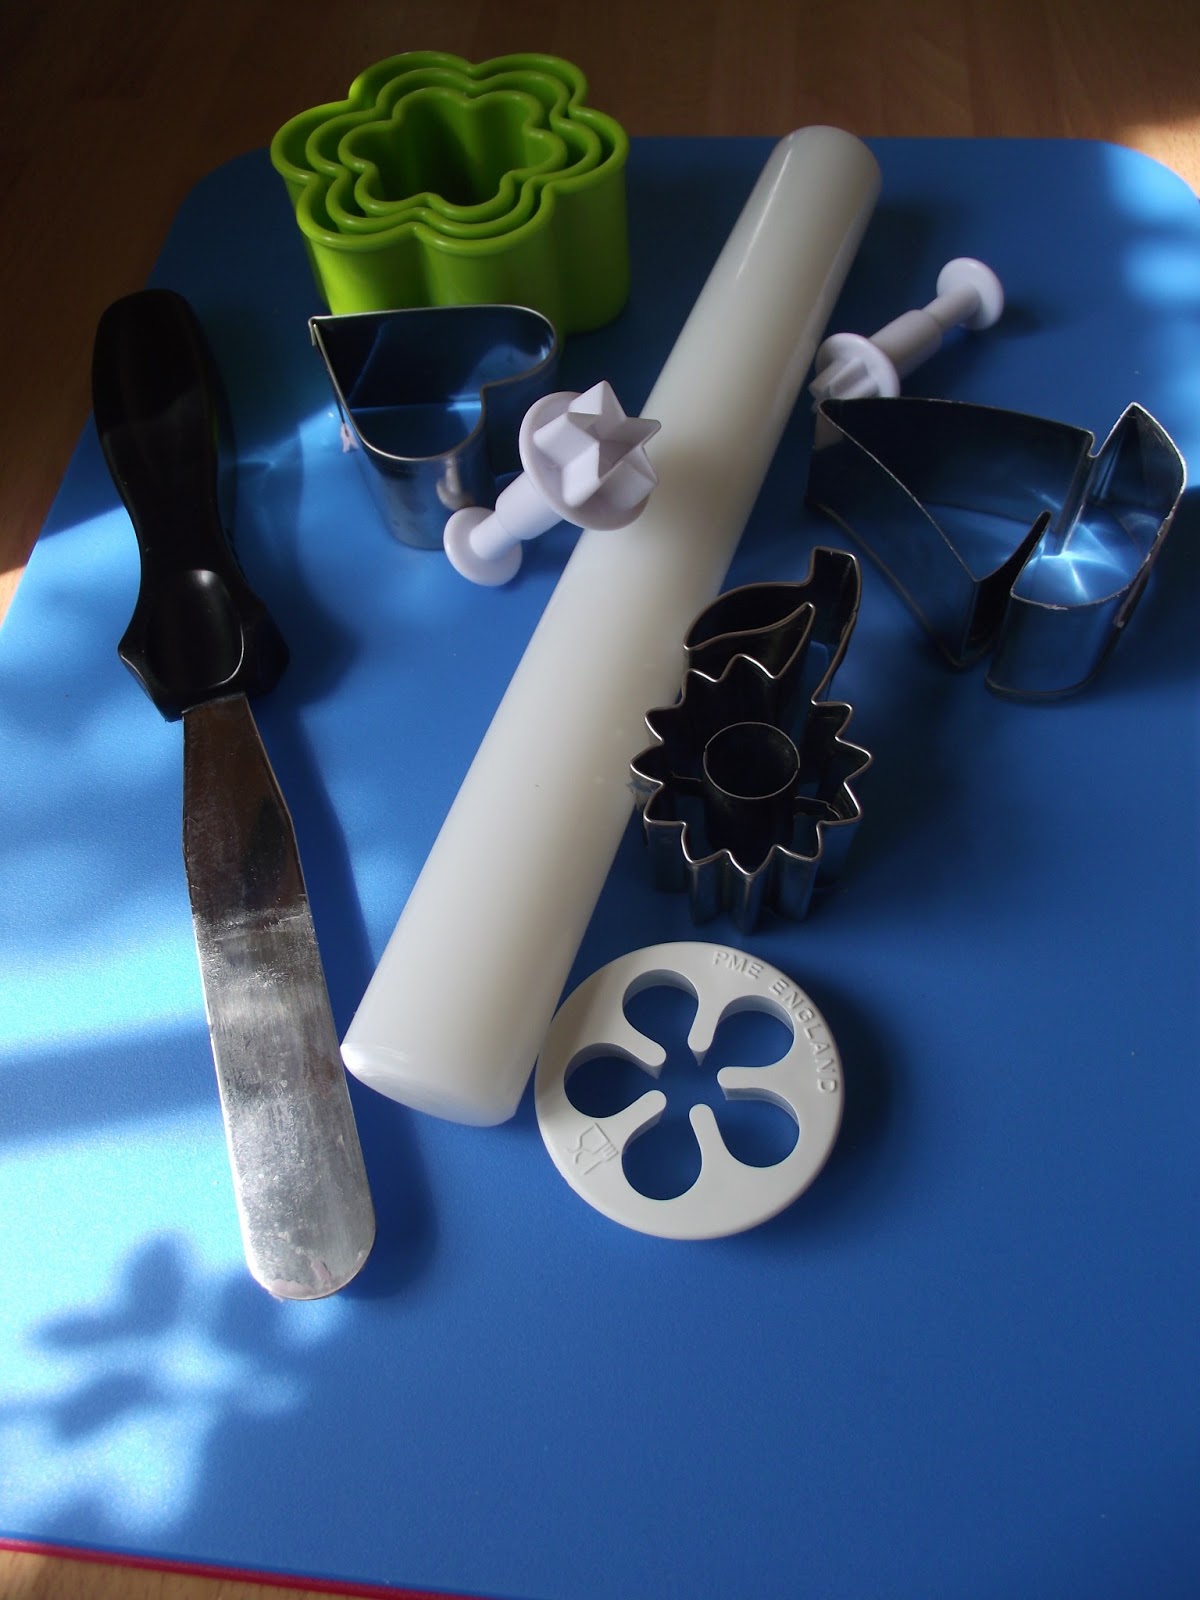
Once cooled you then get to the fun part.  The making up stage!  Here's some of the tools I used.


I used fondant icing for the decorations this time.  The purple has some Dr Oetker gel colouring kneaded into the white fondant icing.  You just keep adding drops of it, until you have the colour you require.  I didn't glue the icing on.  A soft push on the top seemed to adhere it to the biscuit.

Some of my final offerings.


I can't wait to get a bit more inventive, but these were a start!  Do you like my new cake tin - a cheeky birthday present from friends :-)


Some more practise on the biscuits I think, then decide what else to make from my new baking challenge list!

Happy baking!

Friday, 28 December 2012

Schweineorchen or Pigs Ears!

OK, I know, I've been an absent blogger.  Funnily enough that thing called Christmas got in the way and I was busy finishing off lots of handmade goodies that couldn't be blogged until after the event.

One of the quickest and simplest things I made were a baked item from my Dr Oetker 'Backen macht freude' Baking book that I got in Germany.  A lovely lady I work for remembered  'Schweineorchen' or Pigs Ears from her childhood, so I just had to make her some.

Simply take a roll of ready rolled puff pastry and spread it out on a worktop sprinkled with icing sugar to stop it sticking.  Brush with 25g melted and cooled butter. Then sprinkle a mixture of 50g castor sugar and a sachet of Dr Oetker Vanilla sugar (approx. 7g if you have vanilla sugar in a jar) all over the sheet of puff pastry.

Then the fun bit begins.  Roll the pastry nice and tightly from each end, until both sides meet in the middle.  Wrap in clingfilm and pop in the fridge for 30 minutes.  Preheat your oven to 200c static or 180c fan oven

Line a couple of baking sheets with parchment paper and then slice your pastry at 1cm intervals and place on the baking sheets.  Leave enough space for expansion.
You'll see now why they are so named!

In a static oven, bake one sheet at a time for 15 minutes, turning halfway through, or baked until golden in colour.  In a fan oven you can do two or three sheets at a time.

Once baked, slide onto a wire rack to cool and sprinkle with more vanilla sugar whilst still warm.


As you can see I have two varieties as I also had some all-butter puff pastry in the freezer, so wanted to compare.  The ones on the left are with the ready-roll pastry and hold their shape much better.  I still need to roll them more tightly to get a better shape though.


Still they tasted great, were nice and crunchy and can be kept in an airtight container for up to 2 weeks (unlikely!).  Plus they got the seal of approval from my German friend.

On the sewing front I had a lovely time making a Clothkits dress for my Niece, Ellie. 


I can recall my talented Mum making clothes for my Sister and I, so thought this would be a good starting point.  I got to add a lining, make a button placket and buttonholes on my new sewing machine and learn other new skills with the handy online sewing guide.  Plus I may just have bought another dress pattern in red corduroy to try :-)

Happy crafting!

Saturday, 27 October 2012

Butterscotch cookies & Raspberry Cupcakes!

I'm over in Germany having some fun girl-time with my Niece and Sister and you guessed it!  Yup, we've done some baking.  We used the excuse to invite a friend and her twins over for a little Afternoon Tea and chose to make Butterscotch Cookies and Raspberry Cupcakes.  Now my Sis likes playing in the kitchen as much as me, but I bet her cupcakes will be better decorated than mine :-)

The Butterscotch Cookie recipe came out of her Good Food Magazine and is super simple.  Its a basic cookie recipe, but with a sneaky addition of some puffed rice breakfast cereal to give them a crunch.  We managed to get hold of some Choco Krispies, so they added a bit more chocolate to the mix - no harm in that!


We also added the chocolate chips into the batter, rather than popping on the top for decoration.  The recipe says it makes 10 cookies (we doubled-up), but you definitely get more than that.  We got 23 from a double batch and they could have been smaller.


We popped them in a Gas Mark 3 oven for 18 minutes or so.  Half-way through they were taken out and banged on the worktop (use a tea-towel in between to save the work-top).  This helps get out some of the air-bubbles and flattens out the cookies. 

Bake until golden brown.  They may still feel soft on top, but they will firm up when cooled.


Sweet, but not overly so, with a nice crunch from the Krispies.

Our little kitchen assistant managed to get hold of my Dr Oetker Cupcake Recipe book and chose the Raspberry Cupcake page to look at.  She was most insistent that this was the page - so the decision was made - Raspberry Cupcakes it was!


Now the fun thing for this recipe, was that the book is all in German.  Thankfully Google Translate came to the rescue and we figured it all out.  But you did have to use a little lateral thinking.  Cupcake rust = bake until golden brown!

A nice simple recipe again, that used frozen raspberries tossed in cornflour (to help prevent them leak juice everywhere and sink to the bottom of the batter) and yogurt in the batter.


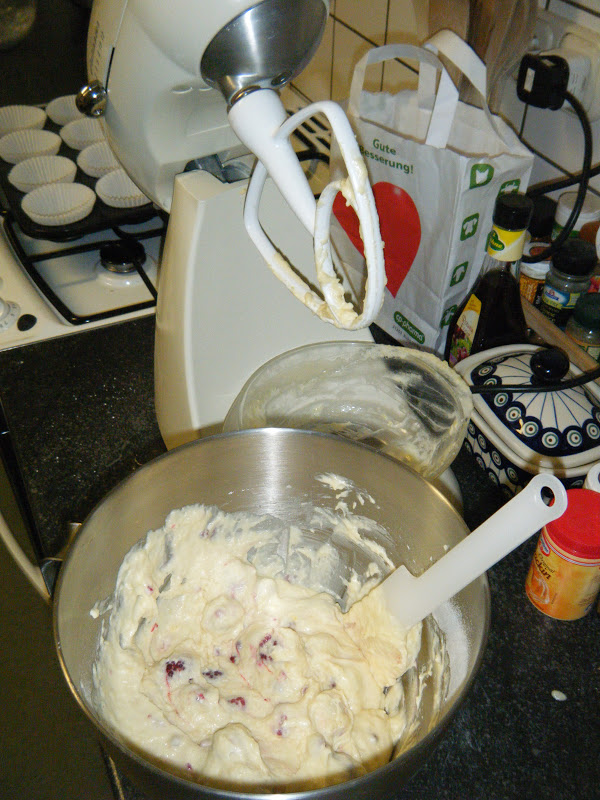
All mixed together, the batter was divided between the 12 cupcake cases......


and then baked for around 25 minutes until just golden on top and a skewer came out clean.  Amazingly the raspberries defrosted in the oven and it all baked through perfectly.

The topping consisted of whipping cream, Sahnesteif  (a German cream stiffening agent) and raspberry syrup, which was all whipped up until nice and stiff.


Then we had fun with the piping bag!  My Sis was much more precise!


Whereas I couldn't stop giggling!


The recipe had way too much cream for the amount of cupcakes - you could easily get away with half.  Despite one cupcake missing - well we had to test one to make sure it was alright before icing....................


A fun afternoon baking with my Sis and then a equally nice afternoon consuming the goodies with friends.


So what are you baking?